-
概述
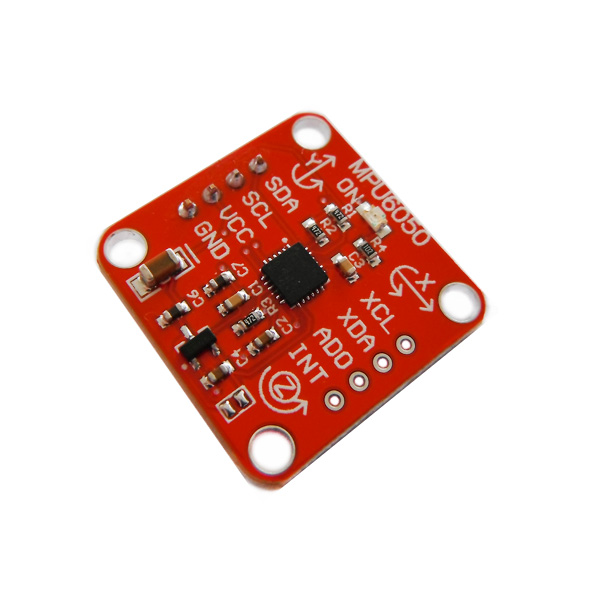
MPU6050整合3轴陀螺仪和3轴加速度,它非常准确,每个通道都有16位的ADC,因此它能够同时捕获XYZ信道。现今MPU6050被广泛应用于移动设备、穿戴式设备、机器人姿态识别等领域。
-
摘要
-
模块参数:
尺寸:25mm*25mm
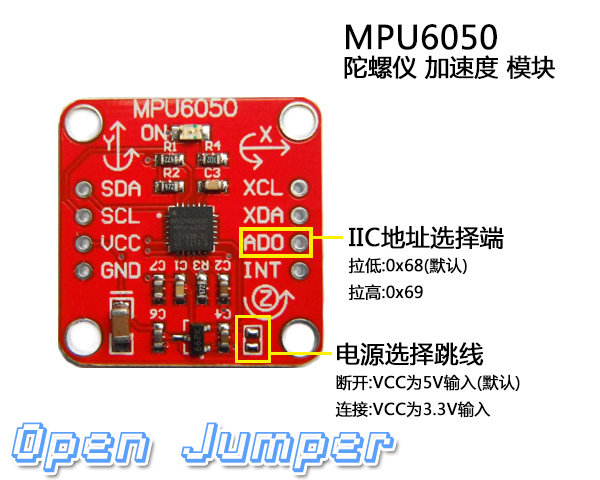
工作电压::5V或者3.3V(短接跳帽为3.3V)
信号:数字信号
-
引脚定义:
| SDA | I2C 串行数据 (SDA) |
| SCL | I2C 串行时钟 (SCL) |
| VCC | +5V(连接跳帽,3.3V供电) |
| GND | – 接地引脚 |
| XCL | I2C 主串行时钟, 用于连接外部传感器 |
| XDA | I2C 主串行数据,用于连接外部传感器 |
| AD0 | I2C 地址选择 |
| INT | 中断数字输出(推挽或开漏) |
-
使用示例:
先下载 I2CdevLib
/*OJ mpu6050 Sensor
 www.openjumper.cn
 */
// Arduino Wire library is required if I2Cdev I2CDEV_ARDUINO_WIRE implementation
// is used in I2Cdev.h
#include "Wire.h"

// I2Cdev and MPU6050 must be installed as libraries, or else the .cpp/.h files
// for both classes must be in the include path of your project
#include "I2Cdev.h"
#include "MPU6050.h"

// class default I2C address is 0x68
// specific I2C addresses may be passed as a parameter here
// AD0 low = 0x68 (default for InvenSense evaluation board)
// AD0 high = 0x69
MPU6050 accelgyro;

int16_t ax, ay, az;
int16_t gx, gy, gz;

#define LED_PIN 13
bool blinkState = false;

void setup() {
    // join I2C bus (I2Cdev library doesn't do this automatically)
    Wire.begin();

    // initialize serial communication
    // (38400 chosen because it works as well at 8MHz as it does at 16MHz, but
    // it's really up to you depending on your project)
    Serial.begin(38400);

    // initialize device
    Serial.println("Initializing I2C devices...");
    accelgyro.initialize();

    // verify connection
    Serial.println("Testing device connections...");
    Serial.println(accelgyro.testConnection() ? "MPU6050 connection successful" : "MPU6050 connection failed");

    // configure Arduino LED for
    pinMode(LED_PIN, OUTPUT);
}

void loop() {
    // read raw accel/gyro measurements from device
    accelgyro.getMotion6(&ax, &ay, &az, &gx, &gy, &gz);

    // these methods (and a few others) are also available
    //accelgyro.getAcceleration(&ax, &ay, &az);
    //accelgyro.getRotation(&gx, &gy, &gz);

    // display tab-separated accel/gyro x/y/z values
    Serial.print("a/g:t");
    Serial.print(ax); Serial.print("t");
    Serial.print(ay); Serial.print("t");
    Serial.print(az); Serial.print("t");
    Serial.print(gx); Serial.print("t");
    Serial.print(gy); Serial.print("t");
    Serial.println(gz);

    // blink LED to indicate activity
    blinkState = !blinkState;
    digitalWrite(LED_PIN, blinkState);
}
-
相关文档
MP6050 schematic:mpu6050-schematici2cdevlib:https://github.com/jrowberg/i2cdevlib

不知道这个模块IIC通信是否和5V兼容呢。 我看数据手册写的模块供电电压为3.3 和1.8啊
实际测试,是可以承受5V电平通信的,但供电电压必须3.3V,模块上已经带有3.3V稳压,所以不用担心
麻烦问下,我下载了i2cdevlib,用arduino IDE加载库的时候,说找不到可用的库是怎么回事啊?是这个ZIP文件过期了么?